eSIM has been available in Thailand for many years and is becoming more popular.
It’s much more convenient than a physical SIM card. There’s no need to remove your phone case and search for a hairpin to insert a new SIM card.
With an eSIM, you can install it on your phone through a QR code or a SIM card application. You can even do this before flying to Thailand. Once you arrive, you can use the internet right away.
You know what else is cool about eSIMs? If all you need is some data for messaging, you can get one for free. Instantly even. Here’s the link.
In this article, we will guide you through everything you need to know about using an eSIM in Thailand, including pros, cons, speed, coverage, plans, options, and the best places to buy one.
Let’s take a look.
"*" indicates required fields
Disclaimer: This article may include links to products or services offered by ExpatDen’s partners, which give us commissions when you click on them. Although this may influence how they appear in the text, we only recommend solutions that we would use in your situation. Read more in our Advertising Disclosure.
Contents
Key Takeaways
- eSIM is a new technology and is recommended for everyone if your phone supports it.
- You can get an eSIM from both international and local providers.
- To install an eSIM, you need to either download an app or scan a QR code.
- If you buy an eSIM from an international provider, you can set it up and use it immediately after you arrive in Thailand.
- If you are traveling to Thailand alone, you often get the best deal from Airalo.
- If you are visiting several countries within the same trip, check out GigSky.
- You can use our coupon code EXPATDEN to get an additional discount from both providers.
- Alternatively, you can buy an eSIM at Thailand’s international airport from a local provider.
Advantages
Let’s take a quick look at the advantages of using an eSIM when traveling to Thailand:
- Convenience
- You can pre-install it on your phone. Once you arrive in Thailand, you can activate and use it right away.
- If you plan to visit Thailand regularly, you can keep your eSIM and top it up easily without needing to buy a new one.
- You can download an app in advance to help monitor data and manage your plan easily.
- Security
- For those concerned about security, you no longer need to give your passport to a SIM card seller.
- There’s no physical SIM card swapping, so you won’t need to worry about your main SIM card getting lost during your trip to Thailand.
- International coverage: Many eSIM providers offer international plans, allowing you to buy a single plan and get internet access in every country you visit, not just Thailand.
Disadvantages
There are only two disadvantages of using an eSIM:
- Not all mobile phones support eSIM: Only some high-end or newer smartphones are currently eSIM-compatible.
- Not all mobile phones support dual eSIM: If your main SIM card is an eSIM, you may be able to install multiple eSIMs but not activate two simultaneously.
Other than that, if you use an eSIM from a local network provider, it works similarly to a physical SIM card in terms of price, speed, and coverage.
However, if you use an international provider, there may be more disadvantages, including:
- Price: Currently, eSIMs tend to be more expensive than local SIM cards.
- Speed and coverage: Speed and coverage might not be as good as with a local physical SIM card.
- Local phone calls: You can’t make local phone calls with an eSIM. However, it’s still possible to call using an online number, such as Skype.
eSIM Price
The price of an eSIM is the same as a physical SIM if you buy it from a local network provider.
Here’s what you should expect to pay:
| Duration | Internet Plan | Price (THB) |
| 8 days | Unlimited internet | 449 |
| 15 days | Unlimited internet | 699 |
| 30 days | Unlimited internet | 1,199 |
| 8 days | 15GB of internet | 299 |
| 15 days | 30GB of internet | 599 |
Depending on promotions, all plans may also come with unlimited local calls.
On the other hand, if you buy from international eSIM providers, it’s going to cost slightly more. Here’s what you should expect to pay:
| Duration | Internet Plan | Price (US$) | Price (THB Approx) |
| 7 days | 1GB | US$5.99 | THB200 |
| 30 days | 10GB | US$34.99 | THB1,200 |
For the best eSIM deal, check out Airalo. You can get 30 days of unlimited internet for less than THB1,000 using our coupon code “EXPATDEN” during purchase.
eSIM Speed and Stability
The mobile internet speed in Thailand is generally fast and stable. According to Speedtest.com, here’s the average mobile internet speed:
- Download speed: 53.95Mbps
- Upload speed: 14.59Mbps
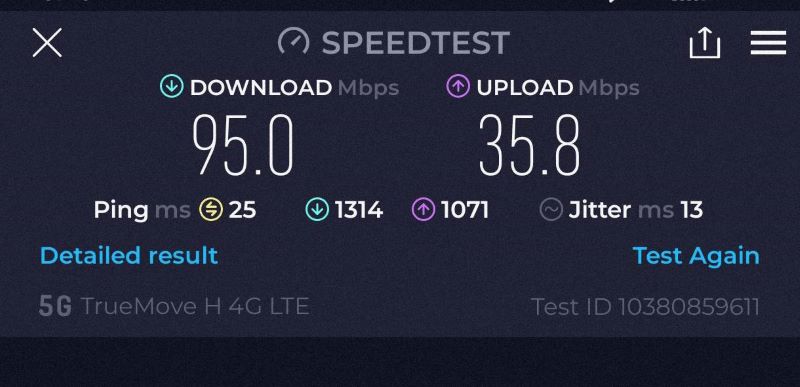
This speed is fast enough for most regular phone uses, such as:
- Watching online videos
- Using social media
- Using Google Maps for navigation
eSIM Coverage
Unless you’re traveling to the top of high mountains or very rural areas, you should have mobile coverage almost everywhere in Thailand.
How to Set Up an eSIM
There are two main ways to set up an eSIM on your phone:
- Using a QR code
- Using a mobile application
The process is straightforward.
Most eSIM sellers will send you step-by-step instructions on how to add the eSIM to your phone.
QR Code
The QR code method is the most common way to add an eSIM. After purchasing an eSIM, you’ll usually receive a QR code via email.
Here’s what you need to do:
- Go to “Cellular” or “Mobile Network” settings on your phone
- Select “Manage eSIM” and “Add eSIM”
- Scan the QR code
Once done, you can activate the eSIM whenever you’re ready to use it.
Mobile Application
This method is even easier but is only available through certain eSIM providers.
Here’s how to set up an eSIM via a mobile application:
- Download the provider’s app onto your phone
- After purchasing a plan, the app will ask if you’d like to install the eSIM
- If yes, the app will automatically install the eSIM on your phone
- If not, you can install it later through the app
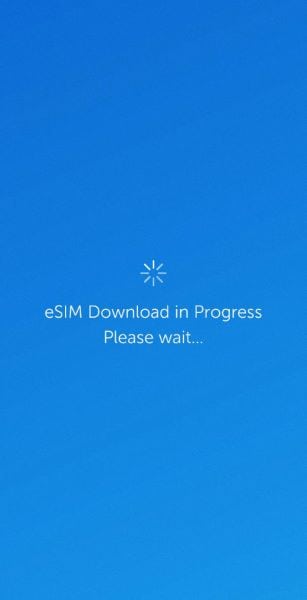
Once installed, you can manage your eSIM under the “Cellular” or “Mobile Network” settings on your phone.
eSIM Options
There are two main options when it comes to buying an eSIM in Thailand: local network providers and international providers.
Local Network Providers
Since eSIMs have been available in Thailand for many years, all major local network providers offer eSIM options to both tourists and expats.
The process of buying an eSIM from a local provider is similar to buying a physical SIM card. Once you arrive at any international airport in Thailand, you’ll find booths for the local network providers. Go there and purchase an eSIM.
Instead of receiving a physical SIM card, they will give you a QR code to set up your eSIM on your phone.
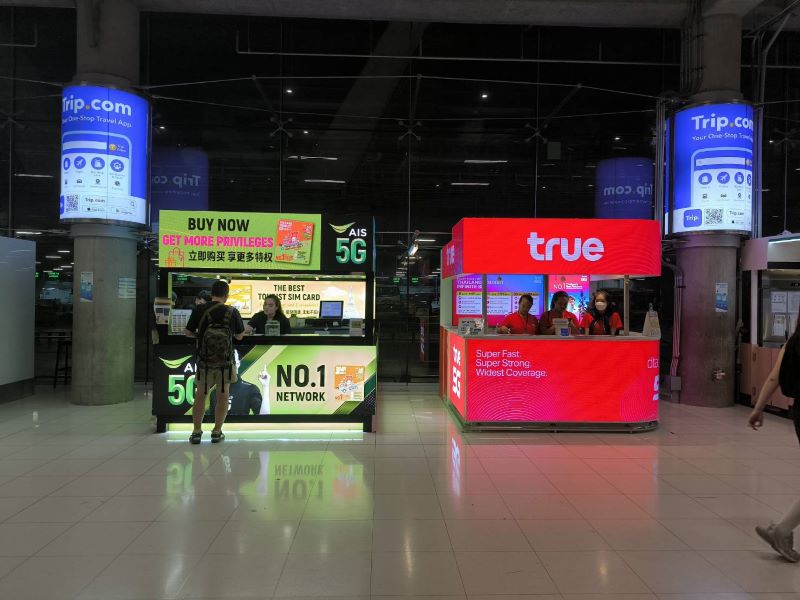
There are three main local network providers in Thailand:
- AIS: Known for fast speeds and extensive coverage
- DTAC: Known for affordable plans
- TRUE: Known for wide-ranging coverage across Thailand
Mobile coverage in Thailand is excellent, and there is little difference between providers in most areas. Pricing is also similar across the board. Unless you plan to visit very rural areas, you can choose whichever provider has the shortest queue at the airport.
Here are the pros and cons of buying an eSIM from a local network provider:
Pros:
- Generally, the cheapest option
- Staff can help you set up the eSIM and ensure it works properly
Cons:
- You can’t use the internet immediately upon arrival in Thailand
- You may need to wait in a queue, which can take up to 15 minutes or more, depending on how busy it is
- You still need to present your passport to the SIM card seller
- You can primarily get an eSIM at the airport or at official provider shops
International Providers
There are two types of international eSIM providers:
- eSIM resellers
- Virtual network operators
Here’s the difference between them:
eSIM Resellers
Many international eSIM resellers sell local eSIMs on their websites. In Thailand, most of the time, the eSIM is provided by DTAC.
- You get similar benefits to a local eSIM
- The price may be slightly higher than buying directly from a local provider
- However, it’s more convenient because you can install the eSIM on your phone before arriving in Thailand
- After purchasing, they will send a QR code to your email, which you can scan to set it up on your phone

If you want to go this route, we recommend Airalo as the best option.
- They resell eSIMs from DTAC
- Prices can be cheaper with the discount code provided below
- They also offer an app to help manage your data
Use the following coupon code to get a 10% discount when purchasing an eSIM from Airalo: EXPATDEN
There are three main downsides of Airalo and other international eSIM resellers:
- You may need to buy another eSIM if your trip is longer than initially planned.
- In case there’s a connection issue with your plan, they may not be able to help you since they only resell plans from local providers.
- Plans mainly work within Thailand.
Other eSIM resellers include Gigago, eSIM Thailand, Gohub, and more.
Virtual Network Operators
Virtual network operators (VNOs) develop their own software and partner with local network providers to offer eSIM services in Thailand.

They may partner with one or multiple local providers.
- If partnered with multiple network providers, the eSIM can automatically connect to the strongest network in your area, offering the best coverage and speed
- They may offer international plans, not limited to Thailand
- You can easily top up data or buy more days through their apps
- Prices tend to be higher than local options
If you want to use a VNO, we recommend GigSky. They have competitive pricing and great speed and coverage across Thailand.
You can read our GigSky review to learn more about their services.
Saily is another virtual network operator. While they are slightly cheaper than GigSky, we weren’t satisfied when we tried them the last time, shortly after they initially released their Thailand eSIM plans a few months ago. We experienced issues from installation to connectivity, even though we tested it in Bangkok. Maybe things have changed, but we haven’t had a chance to try it again yet.
Which eSIM Should I Get?
In this section, we will help you choose the best eSIM based on your needs:
- If you want the best price, buy an Airalo eSIM using our coupon code “EXPATDEN.” With it, you’ll get 15 days of unlimited internet and local calls for under US$19.99.
- If you’re an adventurous traveler heading to remote areas, buy an eSIM from AIS for the best coverage in rural regions.
- If you don’t mind paying a little extra and want top coverage and speed, go with GigSky.
- If you plan to travel to multiple countries, GigSky is still your best option with their Asia Pacific plan and worldwide coverage.
Also, remember to use our code “EXPATDEN” to get an additional discount when purchasing an eSIM from Airalo or GigSky.
eSIM vs Physical SIM
In our opinion, if your phone supports eSIM, it’s better to use one due to its convenience and security.
The only exception is if your phone can’t activate two eSIMs simultaneously, and you need your primary eSIM active while traveling. In this case, using a physical SIM might be more practical.
Changing a Physical SIM to eSIM
This section is for expats in Thailand who have a physical SIM card and would like to switch to eSIM.
You can easily do this by visiting an official network provider’s shop with your passport and requesting the change to eSIM.
The staff will check if your phone is compatible, and if it is, they will handle the setup for you. The whole process takes about 10 minutes.

However, there are a few drawbacks to consider:
- Since eSIM technology is still relatively new, if you change your phone, you may need to visit the shop in person to have the eSIM set up again on your new device.
- If your phone only supports one active eSIM at a time, it may be more practical to continue using a physical SIM. This way, when traveling, you can keep your main SIM active while using another eSIM for data or calls.
Now, on to You
If you’re traveling to Thailand, we highly recommend using an eSIM instead of a physical SIM if your phone supports it. It’s much more convenient and secure.
We also expect eSIM technology to become even more popular in the near future.
And when it comes time to buy your eSIM, whether from Airalo or GigSky, don’t forget to use our code “EXPATDEN” to get an additional discount.


